Do you have a bulky audio file that you’d like to share or play on your mobile devices. Compressing or converting an audio file enables you to easily share and move the file between devices. One of the best free audio convertors is the Free Mp3/Wma/Ogg Converter.
I’ve been using it for a couple of years to compress files for documentary transcription and I find it to be reliable and easy to use. Let me show you how you can compress an audio file in 5 simple steps.
Step 1: Download and Install the Free audio converter
First download the Free Mp3/Wma/Ogg Converter and install it to your computer. Run the software and click on the add button. A window opens that allows you to select the file you wish to compress or convert. Click on Open to add the file.

Step 2 : Select and Add files to be compressed
The file is added into the Free Mp3/Wma/Ogg Converter and is ready to be compressed. You can add more files if you wish. Click on next to take you the next step.

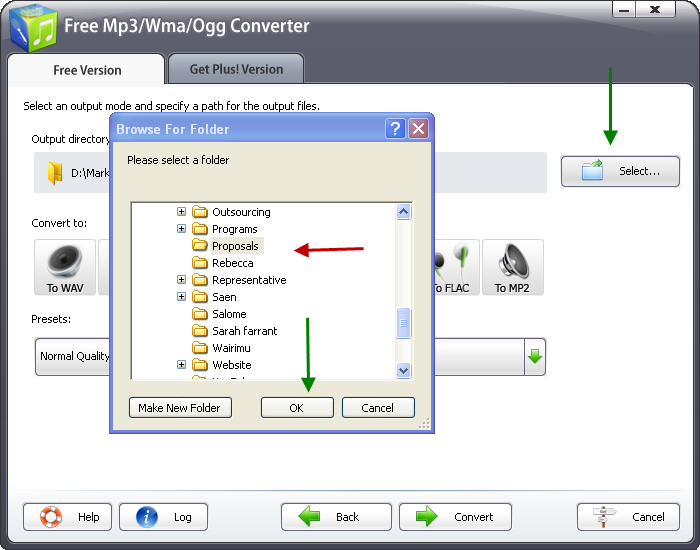
Step 3: Designate output folder
Now you’ll need to designate the folder you wish your output file to be saved in. Click on the select tab and a Browse for folder window opens. Select the folder you wish the output file to be saved to and click ok.
Step 4: Designate Output Format
You need to select the format of the output file. Mp3 if a popular format but only offers average compression. M4A is a less popular format but it offers higher compression. From experience, I find that the Mp3 format compresses a WMA lossless file to around 20% of its original size. On the other hand, the M4A format compress a WMA lossless file to about 10% of its original size. The output files are of similar quality.
Once you have selected the format, you need to select quality of the output audio. Keep in mind that the higher the quality, the larger the file. When you’ve selected the quality of the audio, click on Covert to start the compression process.

Step 5: Check Progress of conversion; have a cuppa!
A conversion progress window opens. You can use this to check the progress of your conversion. When the conversion is done, a window will automatically open that has a link to the output folder. If you wish to convert more files, click on Finish.


That’s it. You’ve compressed your audio file in 5 Easy Steps.
Leave a Reply