FFmpeg is a powerful and versatile tool that can convert, edit, stream, and record audio and video files. It is widely used by professionals and hobbyists alike for various multimedia tasks. However, FFmpeg is not a graphical program that you can just click and run. It is a command-line program that requires proper installation for ease of use.
In this blog post, I will show you how to install FFmpeg on Windows 10 or 11 in four easy steps.
Step 1: Download FFmpeg for Windows
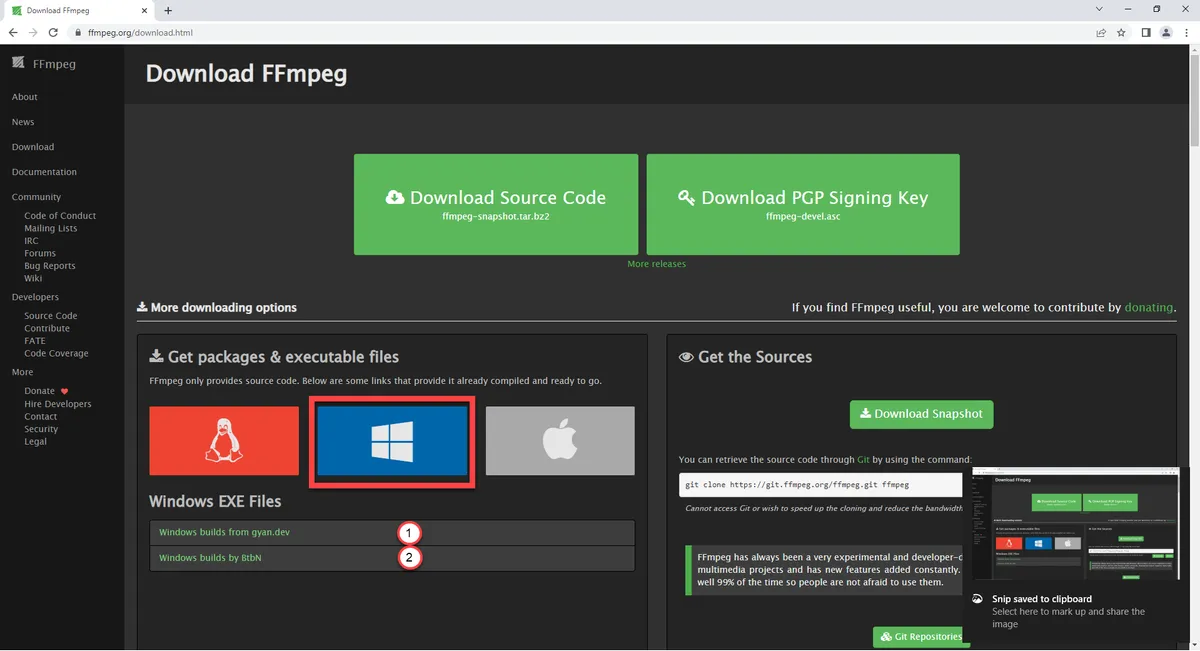
The first step is to download the latest version of FFmpeg for Windows from the official FFmpeg website.
On this page, you will see different options for downloading FFmpeg for various operating systems. To get the Windows version, hover over the Windows logo and you’ll get 2 build options; click on “Windows builds from gyan.dev” or “Windows builds by BtbN”.
The Gyan.dev link will take you to their page that has the FFmpeg packages, and the BtbN link will take you to their GitHub page. The main difference between the 2 builds is the compression: Gyan uses 7-zip, while BtbN uses the more common zip file compression. If you don’t have 7-zip installed or a utility that can unzip .7z files, then I recommend you get the BtbN build.
Now, let me try and explain the options that are available on these pages. A build is a compiled version of FFmpeg that includes all the necessary libraries and dependencies. There are different types of builds available depending on your needs and preferences. For example, there are full builds that include all the features and codecs supported by FFmpeg, minimal builds that only include essential features and codecs, shared builds that use dynamic libraries instead of static ones, etc.
For this tutorial, I recommend downloading the full build since it has the most up-to-date features and codecs. On the BtbN Github page, scroll down to click on ffmpeg-master-latest-win64-gpl.zip. For the Gyan builds, look for and click on ffmpeg-git-full.7z. This will download a compressed file with a .7z extension.
Step 2: Extract the Downloaded File

The next step is to extract the downloaded file using a file archive program such as 7-Zip or WinRAR. If you don’t have one installed on your computer, you can download one from their respective websites: https://www.7-zip.org/ or https://www.win-rar.com/.
To extract the file using 7-Zip:
- – Locate the downloaded file in your Downloads folder or wherever you saved it.
- – Right-click on it and select “7-Zip > Extract to “[Name of the file]”.
- – Wait for a few seconds until the extraction process is complete.
Once the extraction process is complete, you should see a new folder with a name similar to name of the zip file that you downloaded. The name of the file will vary depending on when you downloaded it; the current FFmpeg build.
Rename this folder to “ffmpeg” for simplicity.
Step 3: Copy ffmpeg folder to C: drive

The next step is to copy the folder we just renamed to the C:, the root drive, of your computer. This is so that our FFmpeg installation is in easy path that we can remember: C:\ffmpeg\bin\ffmpeg.exe
Step 4: Test FFmpeg Installation
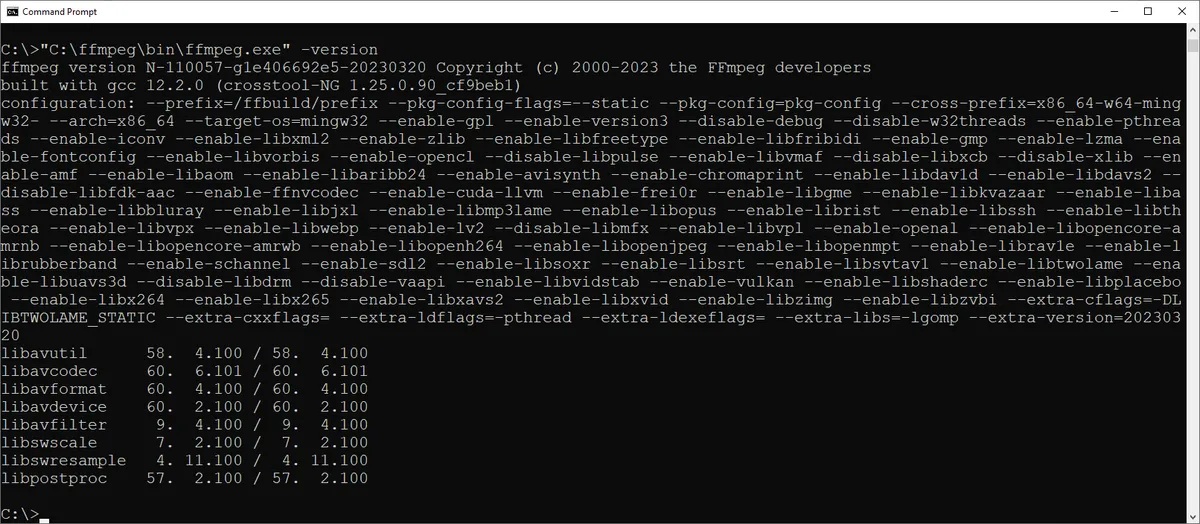
The final step is to test if FFmpeg installation was successful by running the version command in command prompt.
To open a command prompt window:
- – Press Windows key
- – Type cmd then press Enter key
In the cmd window that opens up, type the following command:
C:\ffmpeg\bin\ffmpeg.exe -version
You should see something like this:
And that’s it. You have successfully installed FFmpeg to your Windows 10 or 11 machine. You can now use FFmpeg to perform various tasks with audio and video files. For more information on how to use FFmpeg, check out the official documentation.
In the next post, I am going to share with you how you can add your FFmpeg installation to the PATH so that you will be able to use FFmpeg from any command prompt or PowerShell window without having to type the full path to the program every time. See you then!
Leave a Reply