Do you work with a lot of files? I do. And it’s hard and tedious to keep everything organized. An easy way to keep tabs on each file is to copy all the file names into an Excel sheet and use that to keep tabs of the files as they go through our transcription workflow.
Now before we jump into CMD, you’ll need to know 2 CMD commands: CD and DIR.
CD is short for Change Directory. This is the command you’ll use to navigate through directories, also known as folders, in a drive.
DIR is short for directory, and is used to display information about contents of the current directory. In windows terms, the contents of the current folder.
With that out of the way, let’s me show you how to get a list of all files in a folder and subfolders into Excel.
Step 1: Open Command Prompt (CMD)
Click on windows search or Cortana and search for Command Prompt or CMD. Command Prompt will show up in the search results. Click on it to launch or press enter. You can also launch CMD from the Run command: simultaneously press the windows + r keys and then type CMD and click okay or press enter.

Step 2: Navigate to the Folder
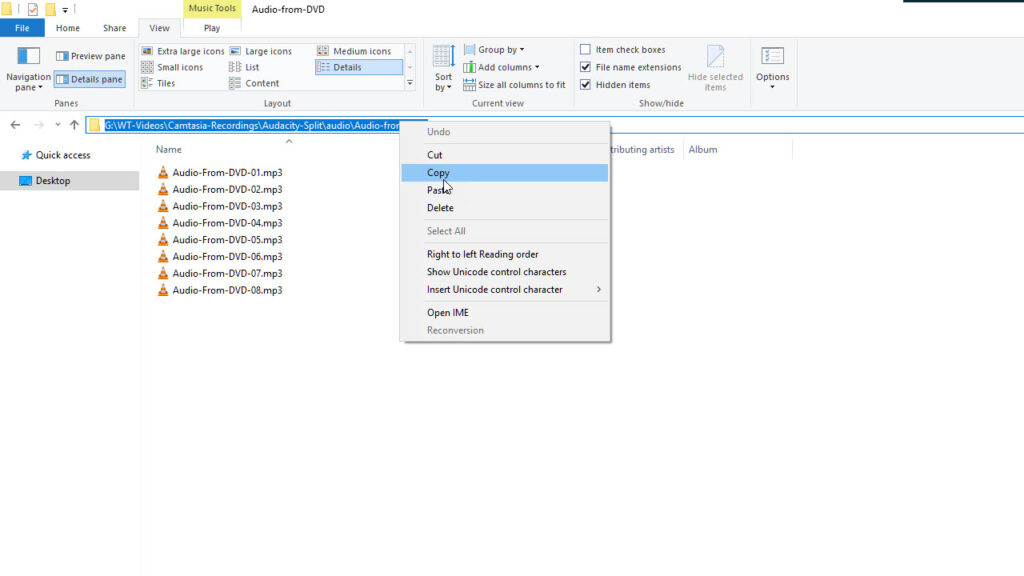
Open Windows Explorer and navigate to the folder that contains the files. Click on the address bar to reveal the folder path. Note the drive letter (we’ll need it in Step 3), in this case it’s G, and then copy the folder path (we’ll use it in Step 4).

Step 3: In CMD Navigate to the Drive
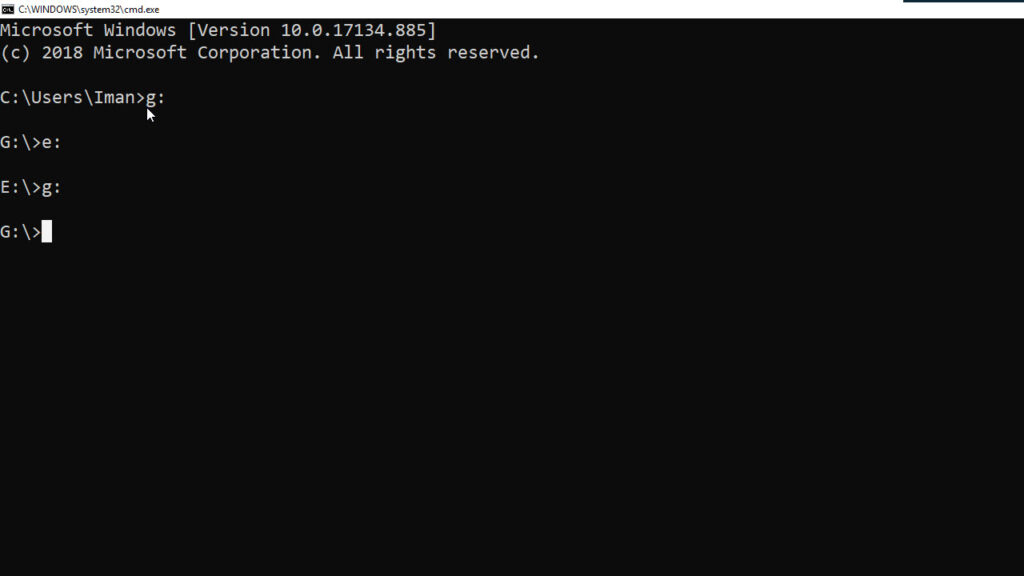
Head back to command prompt and type the drive letter and a colon. This is the drive you noted in Step 2. The drive that contains the folders that contains my files is drive G. So I’ll type G, colon.
So here’s my code:
C:\Users\Iman> g:Then hit enter.
This is how you navigate to drives in CMD. Type in the drive letter, colon, and hit enter.

Step 4: In CMD Navigate to the Folder
Now that we are in the right drive, let’s navigate to the folder that contains the files. We’ll use the change directory command.
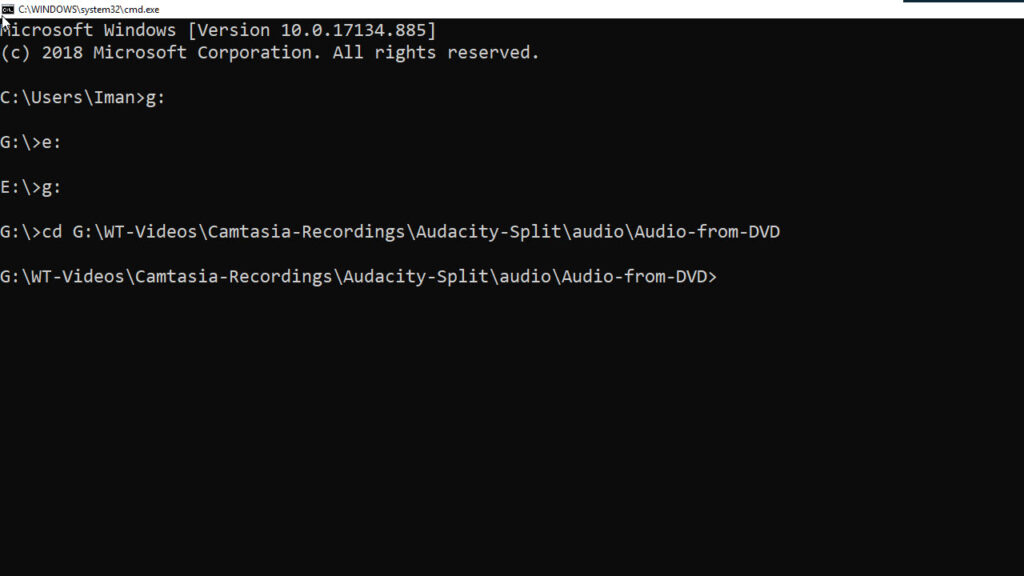
So type CD, space, then right click with your mouse. Right clicking with your mouse pastes the folder path that we copied from the Windows Explorer in Step 2.
Here’s my code after pasting the folder path:
C:\Users\Iman> g:
G:\ cd G:\Audio-Files
Press enter. And you have successfully navigated to the folder that contains your files.

Step 5: Type the DIR Command
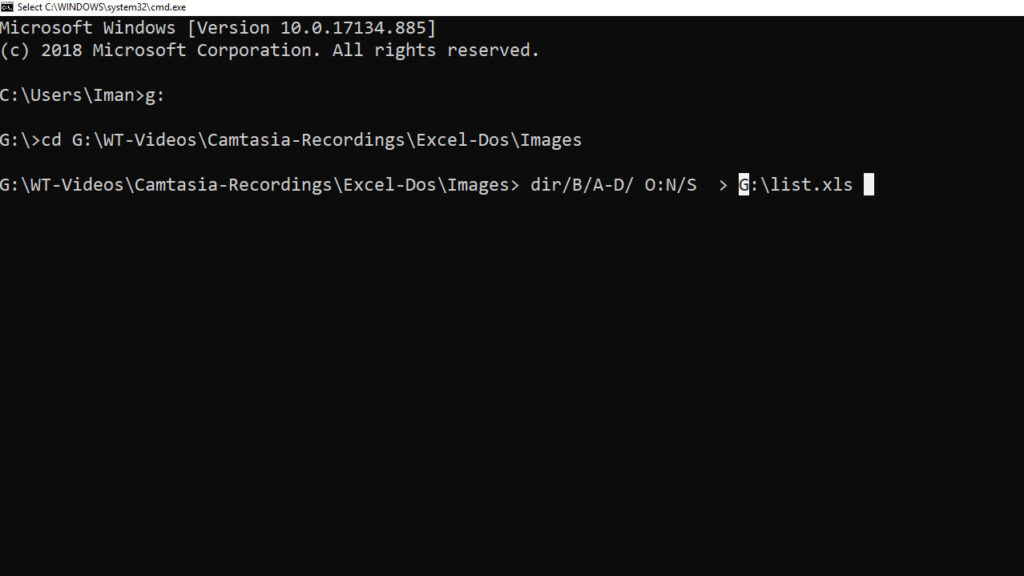
We are going to use the DIR command, which displays the contents of the folder, to display the contents of the folder in Excel. So we type the dir command, and then tell it where to post the output. That’s achieved by typing a space, greater than sign, then the name of the output file. CMD will automatically create this file in the current folder.
I’m going to name my Excel file list.xls. You can change the .xls extension to .txt or .doc and the DIR command will save the file into a Notepad and Word documents respectively.
Here’s my code:
C:\Users\Kongo> g:
G:\ cd G:\Audio-Files
G:\Audio-Files> dir > list.xls
There are a number of attributes that you can add to the DIR command to suite your preferences.
For instance, if you need just the only the filenames you can use:
DIR/B > [filename.xls]
You can sort the filenames alphabetically:
DIR/B/O:N > [filename.xls]
And include all the names of the files in subfolders:
DIR/B/O:N/S > [filename.xls]
Remove the directory path:
DIR/B/A-D/ O:N/S > [filename.xls]
Finally, save the Excel file in a different folder:
DIR/B/A-D/ O:N/S > [folderpath\filename.xls]

Here is a list of attributes you can use:
/A Displays all files with specified attributes.
attribs D Directories R Read-only files H Hidden files
S System files A Files ready to archive – Prefix meaning “not”
Several attributes may be combined e.g. /A:HD-R
/O Lists files in sorted order.
N By name (alphabetic) S By size (smallest first)
E By extension (alphabetic) D By date & time (earliest first)
G Group directories first – Prefix to reverse order
Several attributes may be combined e.g. /O:GEN-D
/S Displays files in specified directory and all subdirectories.
/B Uses bare format (no heading information or summary).
/L Uses lowercase.
Here’s a short video tutorial:
That’s it for this post. And here is another great post on how to rename your files using powershell.
Leave a Reply